Repurposing old storage drives is one of the easiest ways to get more value from hardware you already own. Most homes collect a few over the years. They pile up after laptop upgrades, retired desktops, and outgrown external enclosures. Each one still holds capacity that can do useful work. The real question is which job suits it, and what must happen first.
This guide follows a sensible order. First, it covers taking inventory and checking drive health. Then it matches each drive to a low risk job. Finally, it explains the wipe that protects whatever the drive held before. The steps apply to older hard drives and SSDs alike, and the guide points out where the two differ along the way.
Published guidance and manufacturer documentation supply the details. The article names the source whenever a standard or a figure appears. Prices change often, so none appear here. The goal is a clear plan you can follow with the drives already sitting on your table. No new purchase is required to begin, although a few optional tools get a mention near the end.
Repurposing Old Storage Drives Starts With an Inventory
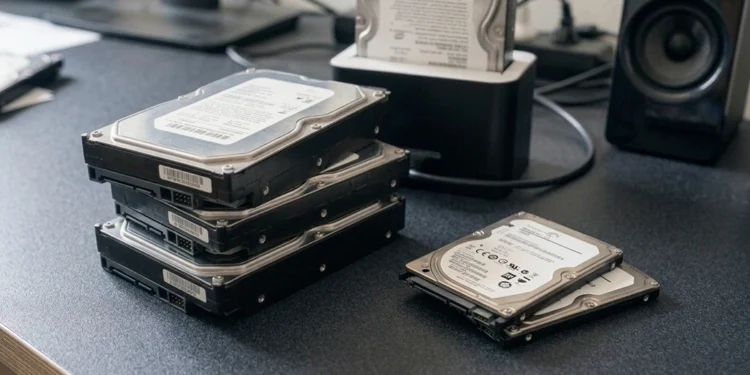
Start by gathering every drive in one place and writing down what you have. Note the form factor first, because it decides which enclosures and docks will hold each drive. Then note whether each one is a spinning hard drive or an SSD. Capacity is printed on the label of most drives, so record it next to the type. A simple list on paper works fine.
Next, write down where each drive came from and what it once stored. A drive from a family computer may hold photos, financial records, and saved logins. A drive that only ever held downloads carries far less. That history matters later, because it decides how careful the wipe should be. Stick a short note on each drive so the details travel with it.
Finally, sort the drives into a keep pile and a retire pile. Anything physically damaged, noisy, or too small to be useful belongs in the retire pile. Everything else moves on to a health check. That check shows which drives deserve a real job when repurposing old storage drives, and which ones should stay on the shelf for now. Be honest during this step, since a drive kept out of guilt only adds clutter.
Checking Drive Health Before You Trust It
A health check separates reliable drives from risky ones. The free smartctl tool reads the SMART data built into SATA drives, SAS drives, and SSDs. According to the smartctl manual page, its health command reports whether a drive has already failed or expects to fail within 24 hours. The same page describes short and long self tests. The short test usually finishes in under ten minutes, while the long test can take anywhere from tens of minutes to several hours. Run the check before anything else, since a failing drive changes the plan.
Age matters, but it works as a rough guide and not as a verdict. In its Backblaze drive stats report, the company links a rising failure rate to the aging of its data center fleet. However, it also notes that some of its oldest drive models posted low failure rates in the same year. So treat any drive that passes testing as usable. Treat its age as a reason to give it a lower stakes job, and retire any drive that fails the test. Run the long test on any drive you plan to rely on for backups.
Matching Each Drive to a Low Risk Job
Once a drive passes its health check, give it work that fits its reliability. Healthy drives suit jobs that keep extra copies of important files. Examples include a backup target, an archive, or a spare that waits on a shelf. Drives with more age on them belong in roles where losing the contents costs little, because the original files live somewhere else. Label each drive with its assigned job once you decide, so nothing gets mixed up later.
That sorting rule keeps repurposing old storage drives safe. No single aging drive ever holds the only copy of anything you care about. The next two sections cover the common jobs that work well, with backups and archives first, followed by shared storage and everyday uses. Pick the job before you wipe, since the plan shapes how thorough the wipe needs to be. Drives with a clean record can earn the longer jobs, while shakier drives take the short ones.
Repurposing Old Storage Drives as Backups and Archives
A backup copy is the most valuable job an old drive can take. The CISA backup guidance calls the 3-2-1 rule a trusted guideline. That means three copies of important files on two kinds of storage media, with one copy kept off site. An old drive can serve as one of those copies. Our guide to offsite data backup shows how to handle the off site piece.
Archive storage is a close cousin of backup. Photos, documents, and finished projects that you rarely open can sit on a drive that stays unplugged between uses. CISA also advises keeping offline copies of critical files. A spare drive works in a similar way. It waits on a shelf, so a failed drive can be replaced without a scramble when the day comes. Label the archive drive with its contents and the date of the last update.
Whichever role the drive takes, test the copy. CISA recommends scheduled recovery tests to verify backup integrity. A simple habit works well at home. Restore a handful of files every few months and open them. Our piece on independent data storage covers how to build a larger home storage routine around that habit, so repurposing old storage drives becomes part of a lasting plan.
Turning Spare Drives Into Network and Media Storage
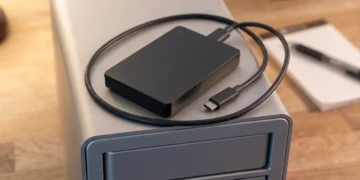
An old drive can also become everyday storage. Placed in a USB enclosure or attached through a USB adapter, it turns into an external drive. That drive moves large files between computers or adds room to a laptop. Match the enclosure or adapter to the size and connector of the drive. The setup then takes only a few minutes, and it needs no special skills. Keep the cables with the enclosure so each drive stays ready to use.
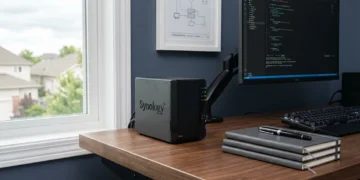
Network storage takes the idea further. Connected to a router that supports storage sharing, or installed in a NAS, the drive becomes a shared folder. Every device in the house can reach it. The same setup works as a media library for movies and music. It can also hold surveillance footage from cameras that record to a network drive, which keeps those recordings off your main computer.
A drive installed inside a desktop can act as a scratch or secondary disk. It suits downloads, game libraries, and large working files. Because those files are easy to replace, this job fits an older drive well. Whichever role you pick when repurposing old storage drives, remember that an aging drive can fail. Keep anything irreplaceable somewhere else too, so one failure never costs you something permanent. A secondary disk also keeps large files off the main drive, which leaves that drive free for the system.
Wiping Before Repurposing Old Storage Drives
Every one of these jobs begins with a wipe, because a drive still carries whatever it stored in its first life. The NIST media sanitization bulletin defines clear as logical techniques that protect against simple, noninvasive recovery. It describes purge as techniques that render recovery infeasible, even against state of the art laboratory methods. Those two levels give you a simple scale for deciding how far to go. Both terms come straight from the bulletin, which also names a third level called destroy.
For a drive that stays inside your home, a clear level wipe fits the job. If the drive will pass to another person, step up to purge level methods. The extra effort costs little. It also removes the chance that a stranger recovers photos, records, or saved logins from a drive you believed was empty. Wipe first, and repurposing old storage drives carries far less risk. Decide the level before you start, and write it on the drive’s note.
Hard Drives and SSDs Wipe Differently
Spinning hard drives and SSDs store data in different ways, so they need different wiping methods. The NIST bulletin states that degaussing and overwriting, the usual methods for magnetic media, are not applicable to flash memory devices. It adds that native overwrite commands may not reliably reach every area of a drive that uses wear leveling. That gap matters for any SSD in your pile. Check which type each drive is before choosing a tool, since a method built for one type can fall short on the other.
For SSDs, the bulletin points to dedicated sanitization commands and to cryptographic erase. Cryptographic erase destroys the encryption keys that protect the stored data. The bulletin also notes that the commands depend on assurance from the vendor. It warns that verifying a cryptographic erase can be difficult. An SSD wipe therefore deserves extra care when repurposing old storage drives for someone else, or before the drive changes hands. Treat any SSD you plan to sell or give away with the most care.
Wiping Tools for Repurposing Old Storage Drives
Contains affiliate links. See our affiliate disclosure.
A hardware eraser makes the job simple when you have several drives to process. The StarTech SDOCK1EU3P eraser dock is a single bay unit for 2.5 inch and 3.5 inch SATA drives. It wipes a drive without a host computer connected. According to its product page, it offers nine erase modes, including secure erase and enhanced secure erase. That range lets you match the method to the drive.
The same dock also works as a USB 3.0 dock. That lets you move files to or from a drive before you wipe it. With an optional serial printer attached, it can print a wipe record. The record lists the date, time, and erase mode. It helps when you want proof of the wipe after a drive changes hands, and it takes no extra software.
People with a pile of drives may prefer the StarTech SATERASER4 four-bay eraser. It handles up to four SATA drives at once. Its datasheet says the secure erase and enhanced secure erase modes meet NIST SP 800-88 Rev 1 clear and purge. It also says the three pass overwrite mode meets DoD 5220.22-M. Choose the single bay unit for an occasional drive and the four bay unit for a larger batch. Either way, wipe SSDs with a secure erase mode instead of a simple overwrite, in line with the NIST caution above.
Selling, Donating, or Trashing an Old Drive
Some drives will never get a second job, and the wipe still applies to them. A drive headed for a sale, a donation, or the recycling bin leaves your control. Everything it stored leaves with it. Wipe it first, using the method that fits the drive type. The next owner or the recycler then receives a blank drive and not your files. Take a few minutes to confirm the wipe finished before the drive goes anywhere.
Drives that fail the health check need a plan too. A drive that no longer responds may refuse a wipe command. The NIST bulletin describes destroy as making recovery infeasible while leaving the media unusable. For a drive that cannot be wiped, destroying the media is the route the standard describes. Keep that option in mind before a dead drive goes in the trash. Ask any recycler how it handles data before handing a drive over.
Repurposing old storage drives pays off when each step happens in order. Take inventory, test health, and assign a job that matches the drive’s reliability. Then wipe before anything else touches it. Do that, and the drives sitting on your table turn from clutter into backups, archives, and shared storage. Otherwise, they leave your home safely, with nothing of yours left inside.